Get started with Milkpaint

Milk Paint comes in powder form – just add water, stir and apply. This is a beautiful thing because it’s simple to do but makes a difference because it means you’re in control of how much or how little paint you want to use. Go ahead and store any leftover powder for your next project!

CHOOSE YOUR SURFACE BELOW TO GET STARTED:

Before we begin, it’s important to prep, clean, and sand your surface as needed. This will ensure that the milk paint adheres properly and produces a smooth finish.


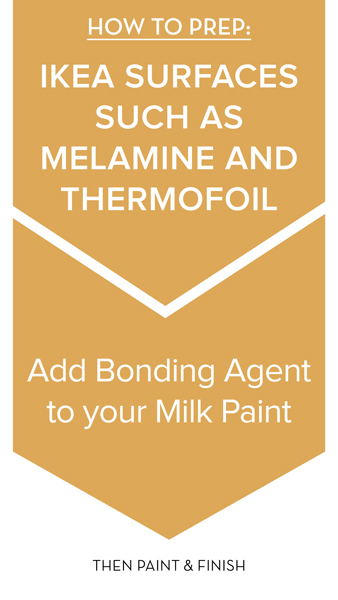
Tip: Applying Milk Paint to a surface that’s not a dull finish or bare wood? Bonding Agent makes the impossible possible! Be confident knowing there will be no chipping, flaking, or peeling. Mix 1 part of Bonding Agent into 1 part paint before applying.

Next,

it’s time to mix your milk paint. Typically, you want to use a one-to-one ratio of water to Milk Paint powder for opaque coverage. Depending on the color of your milk paint and the color you are covering, you may need anywhere from one to three coats.

One of the best things about milk paint is how quickly it dries. You only need to wait 20 to 30 minutes between coats, giving you plenty of time to work on your piece. If the paint leaves a small amount of grit and texture behind, simply use a fine grit sandpaper and pass over it once or twice to smooth the surface.


start painting!

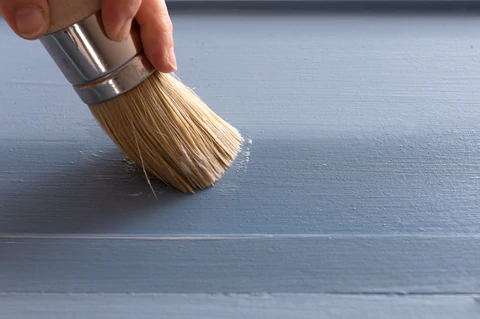
Now comes the fun part – the finishing touch. This i paintings what we like to call the “magic moment.” Using any brush, apply Milk Paint to your surface. Each coat dries within 15-30 minutes (yep – speedy!) and can be re-coated immediately once dried.


FINISH IT

Apply a top coat to seal your Milk Paint and bring out the true depth of colour! This will also protect your paint for a finish that lasts generations. Hemp oil and furniture wax are great, easy to use options!


Will the colour be consistent?

variation of colour

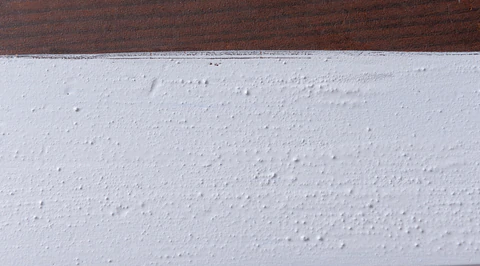
Milk Paint having no binder could result in a variation of colour. Mixing throughout the application will help reduce this effect, but if this happens the results are very pretty and can almost look like a lime wash finish. It’s very important to understand that different batches may result in different colours, as with any paint. It is important to purchase enough paint to complete your project and have a little more than you need just in case! 


Do I need to seal it with something?

Applying Hemp Oil

That is completely up to you. One of the benefits of Milk Paint is it is a breathable coating! If you leave it unsealed, then the true colour of the milk paint will not pop and come to life, there is a potential for watermarks, should your walls come into contact with water. Ceilings or low-traffic walls can easily be left unsealed as long as you like the colour as is. Applying a top coat of hemp oil will saturate your Milk Paint colour to its true vibrancy and provide a surface that can be washed gently. A simple thin coat can be applied with a roller or rag. Make sure to wipe away the excess. Wax is also a gorgeous and easy-to-apply finish.


What if my paint finish crackled?

crackle

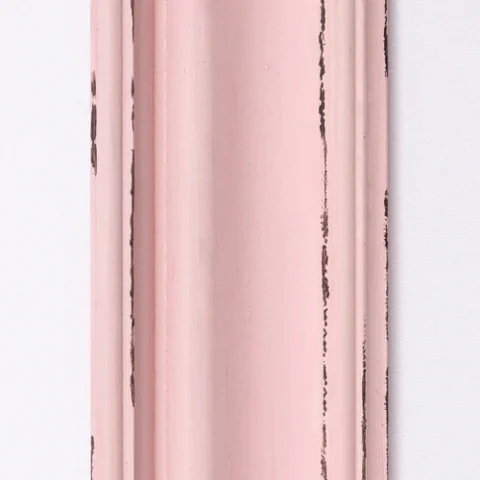
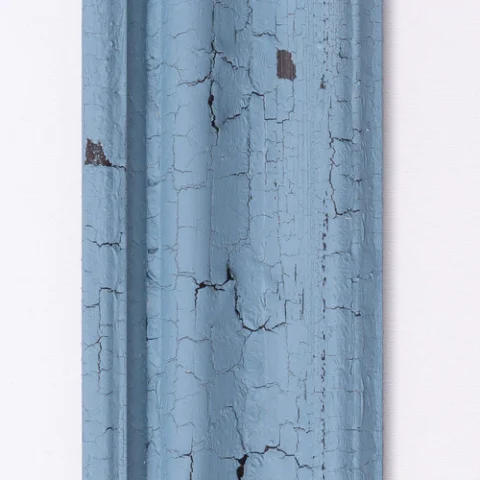
Sometimes if milk paint is applied too thickly, or there was something on the surface resisting the paint, it may crackle here and there. Crackling is a beautiful effect, this can be a very interesting and fun look for the old-world effect. You may gently sand and re-paint this area if it is a cause for concern.

crackle and pop

QUIRKY, UNEXPECTED AND SURPRISINGLY SIMPLE

This stylish effect is simple – and fun – to recreate. Just mix your Milk Paint slightly thicker and use a hairdryer to quickly dry it. Cracks will appear during the drying process. The higher the heat setting, the larger the cracks!

TIP: Paint a base coat of Fusion Mineral Paint first in the colour you want to see showing through the cracks.

Tip: To really show off the details, add a tinted wax to highlight the cracks and the details. Liming wax will lighten and brighten, whereas an ageing or espresso wax will richen and darken it up! Either way, you’ll accentuate those beautiful cracks!

Always test your methods and process prior to tackling a large project.


chippy chic

FARMHOUSE MEETS PENTHOUSE

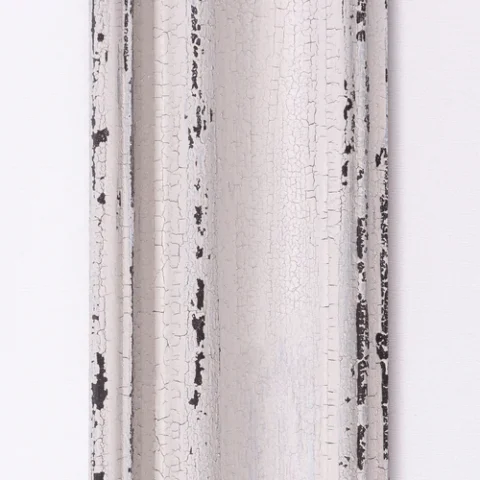
Trust us: You CAN control the chippy! On a surface that has a sheen to it, the chipping will simply occur naturally. On a low sheen surface, you can force the chippy by first applying a resist like our Beeswax Finish or Furniture Wax onto the surface, then the Milk Paint you apply over it will chip off.

You will need to apply more wax to a bare wood or porous surface, than a previously finished/shiny surface. Test this first to see how much wax you need; too much and all the paint will flake off! Not to worry, you can always try again!

Apply the wax strategically in areas that you are looking to see the chipping or flaking paint effect appear.

TIP: Want an aged look? Add one of our tinted Furniture Waxes or our Stain & Finishing Oil for an aged effect.

TIP: Do not add any Bonding Agent if you want the Chippy Chic look.


elegantly distressed

REFINED AND CLASSIC BUT BOLDLY MODERN

Milk Paint is perfect for achieving authentic, natural- looking distressing. Layer colour over colour of Milk Paint, or simply apply over a water-based stain finish, or a coat of Chocolate Fusion Mineral PaintTM which will look like a dark wood stain when sanding through.

220 sanding grit is recommended. When pressed along the edges and any detailing, you will reveal the details!

Try using our Beeswax Distressing Block between the layers of paint. This will ensure it’s easy to distress to reveal each colour.

TIP: Add our hemp oil when distressing so you can see the true pops of colour coming through from below as you are sanding, and to eliminate any dust while sanding! Wipe away the excess residue with a cloth that has hemp oil on it after sanding to reveal the beauty!

Time to get started!

And remember, painting with milkpaint is real fun!


By using our website, you agree to the usage of cookies to help us make this website better. Hide this message More on cookies »